FAQ : Account : 10 easy mini steps to IPv6
Other FAQ sections
10 easy mini steps to IPv6
Signup Phase
Don't try to fill in false, incomplete or invalid data as you will be rejected.
Be nice and honest to the system and the system will be very nice to you.
The data is verified by a real human. When you get rejected for
entering false data, mail the SixXS Staff with the
correct details and explain what went wrong.
The Request statistics show that rejection is quite common.
When signing up with the system, take your time to do so.
Please provide a stable, non-throwaway email address as per our FAQ.
The chances that such a server breaks, and you become unreachable, are very high in our experience, thus we
recommend that you use your ISP supplied email address.
See the Email Requirements FAQ for more details.
Either:
- & 2. Use the SixXS signup (quickest and easiest).
or:
- Use an existing RIPE, ARIN, APNIC, AFRINIC or LACNIC handle with the SixXS Signup
Fill in the handle and enter a reason why you want to use it. You can be as verbose as you like.
SixXS likes to know why people want to use our services.
Then:
- Wait for the signup email, and follow the link specified. We do this to make sure your e-mail address actually works. After verification, your signup is now passed to the SixXS Staff for manual (read: human) approval.
- Wait for the approval mail, which should follow within a reasonable
time. Considering that SixXS don't dedicate 100% of their time
to the project, this can be anywhere between one day and one week.
Patience is a virtue!
Tunnel Request Phase
- Request a tunnel
Go to your tunnel home and request a tunnel.
There are three options here: AYIYA, Heartbeat and static.
Heartbeat can be chosen for cases where you are not behind a NAT or can configure it into DMZ mode, but when you have a dynamic address; and static is for when you have a static IPv4 address without NAT.
The safest one to take (but also the most expensive one for SixXS servers), and the one that almost always works is AYIYA.
Both AYIYA and heartbeat automatically tunnels disable themselves when
not used. They can also be used by people who do not have a static IP address
or are not using it 24/7. Note that a static tunnel requires it to be available
24/7 and if you fail to do that credits will be taken from your account.
- Wait for the approval mail, which should follow within a reasonable
time. Considering that SixXS don't dedicate 100% of their time
to the project, this can be anywhere between one day and one week.
Patience is a virtue!
Tunnel Configuration Phase
- Download AICCU for your platform and also install a driver when needed.
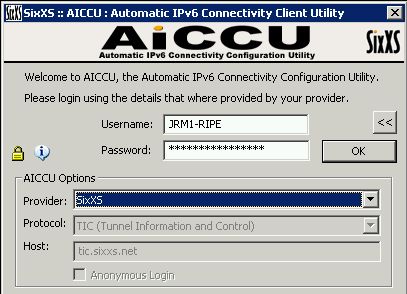
- Start AICCU and login (See below for non-Windows systems).

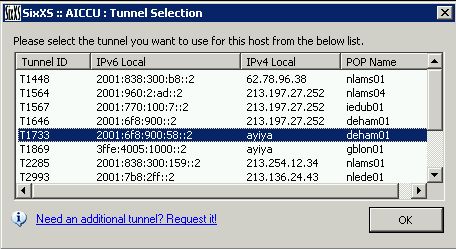
- Select your tunnel.

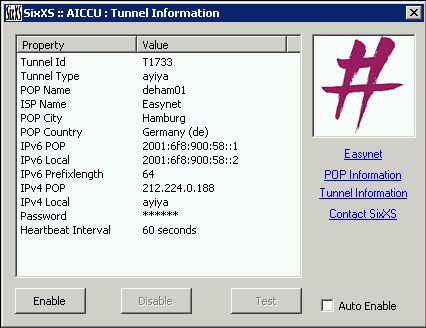
- Hit enable and AICCU configures the tunnel for you

Note: When one has Windows 2000 then you will need to install the Windows
2000 IPv6 stack yourself
Command line usage of AICCU
For Debian based systems there is a debconf frontend available in the package.
There is no GUI version of AICCU for the various UNIX-alike OS's, as such steps 8-10 are in this case:
- Install aiccu from the package you downloaded or by building it from source (using GNU make)
- Configure the /etc/aiccu.conf file by filling in your details
- type "aiccu start" or use eg /etc/init.d/aiccu start
Manual Configuration
When using a static tunnel one can also do steps 8-10 manually.
Static tunnels are most likely also required when you want to terminate the tunnel on a non-PC device like a router running an operating system that is not supported by AICCU.
How to check that it works?
Goto the IPv6 Check, this should reveal that you are using IPv6.
If it does not work, don't hesitate to write in Forums or
to Contact SixXS by sending a problem report.
Do read the "Reporting Problems" section carefully in that case as details are important.
|
 Only one account/signup per person